Before you start
- ✓Comfort opening a PC case and seating PCIe cards
- ✓Basic Linux command-line familiarity
- ✓A spare keyboard/monitor for initial install (you can go fully headless after)
- ✓Budget: $1,500–$3,500 depending on GPU choice
Why build a dedicated server
Running LLMs on your daily-driver PC works until it doesn't. The moment you start an agentic workflow that needs the model loaded for 8 hours, or you want to give your partner access from another room, or you want models persistently running so first-token latency is zero, you want a dedicated server. A second machine in a closet running headless 24/7, called over the network from whatever device you're on.
The build doesn't need to be exotic. A modern AM5 motherboard, a Ryzen 8700G with integrated graphics (so the discrete GPU stays free for inference), 64 GB of DDR5, a fast NVMe, and one or two consumer GPUs is enough to run 70B models with quantization. We're not building a datacenter rack, we're building a homelab-grade inference box.
Step 1: Parts list, explained
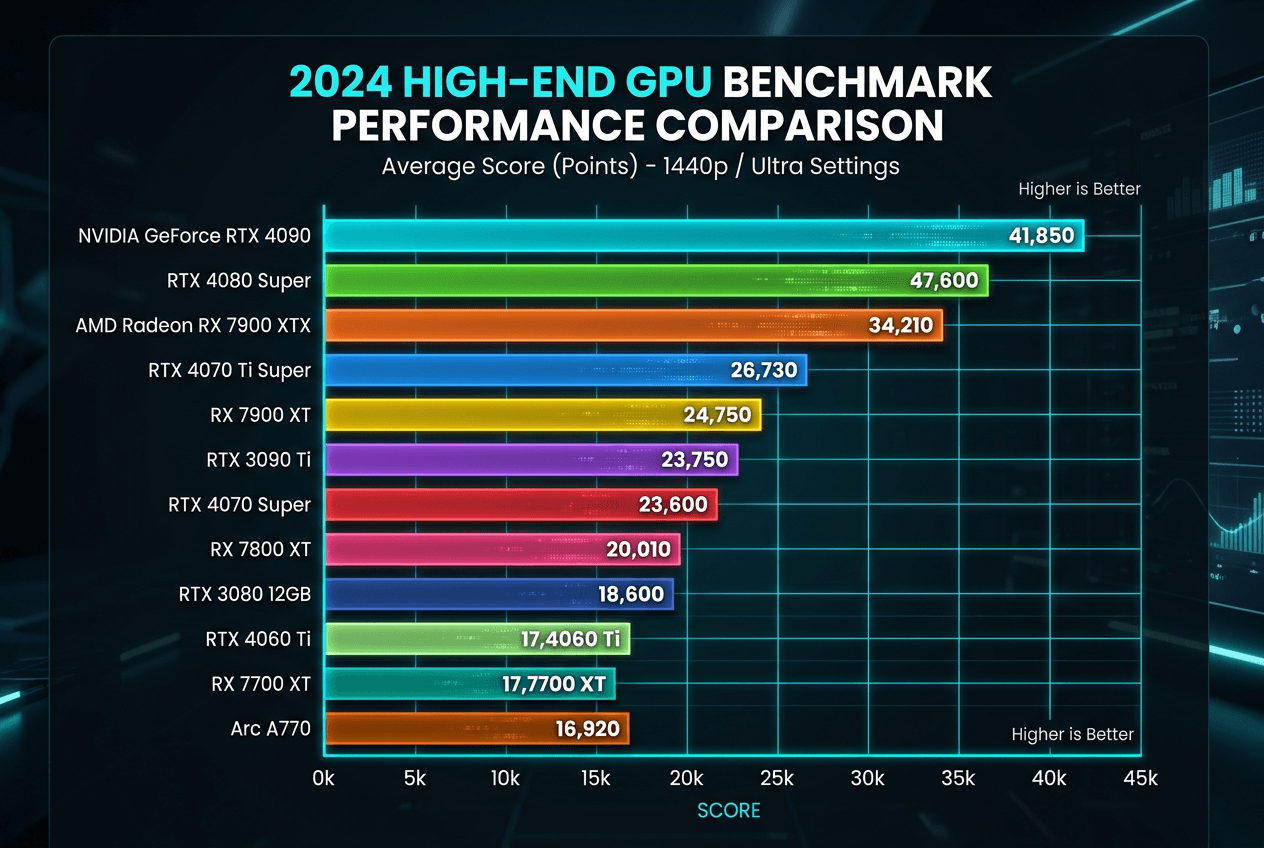
CPU: Ryzen 7 8700G. It has good single-core performance for orchestration logic, ECC support if you go pro, and crucially an integrated GPU so you don't waste a PCIe slot on display output. Motherboard: any AM5 board with 2× PCIe x16 (electrically x8/x8) slots if you plan multi-GPU. RAM: 64 GB of DDR5-5600 minimum. LLM weights live in VRAM, but the KV cache and tokenizer overflow into system RAM in long contexts. Storage: a single 4 TB NVMe drive, Ollama's model cache is the heaviest thing on the disk. GPU: this is where the budget lives. RTX 4090 (24 GB) for new, dual RTX 3090 (24 GB each) for used-budget builds. PSU: minimum 850W gold for a single 4090, 1000W+ for two cards. Case: anything with good airflow, Fractal Define 7 or Lian Li O11 are fine.
If you can find them, two used RTX 3090s for ~$700-900 each give you 48 GB of total VRAM, enough for 70B Q5 with room for KV cache. Better $/GB than any new card.
Step 2: Assembly checklist
Standard PC build, with a few AI-specific notes. Seat the GPU in the top PCIe x16 slot (electrically x16). If you're using two GPUs, set the BIOS PCIe split mode to x8/x8. Plug the GPU power cables into separate rails on the PSU if your PSU has split rails, a 4090 pulls 450W transient. Hook the case to a UPS, model downloads take hours and an unexpected reboot mid-pull leaves you with a corrupted blob.
Build order checklist:
[ ] CPU into socket, paste applied, cooler mounted
[ ] RAM into slots A2/B2 (dual-channel)
[ ] NVMe into M.2 slot 1 (PCIe 5.0 if your board has it)
[ ] Motherboard into case standoffs
[ ] PSU mounted, 24-pin + 8-pin CPU + GPU cables routed
[ ] GPU into top x16 slot, power connected
[ ] First boot to BIOS, XMP/EXPO enabled for RAM
[ ] Update BIOS to latest before installing OS
Step 3: Install Ubuntu Server 22.04
Use the Server edition, not Desktop. You will run this machine headless 99% of the time, there is no point loading GNOME. Burn the ISO to a USB stick with balenaEtcher, boot it, walk through the installer. Pick the minimal install, enable OpenSSH server when prompted, and skip all the snap recommendations. About 10 minutes later you have a clean Ubuntu Server. Take note of its DHCP IP so you can SSH in from your laptop.
# From your laptop, after the server is up:
ssh username@<server-ip>

# First steps inside the server:
sudo apt update && sudo apt upgrade -y
sudo apt install -y curl wget git build-essential htop tmux
sudo timedatectl set-timezone America/Los_Angeles  # set yours
Step 4: Pin a static IP
DHCP-assigned IPs are fine until your router renews them. Then every client pointing at the old IP breaks. Either pin the IP at your router (DHCP reservation by MAC address) or set it statically inside the server using netplan. Pinning at the router is easier and more portable, do that unless your router is too dumb to support reservations.
# If using netplan: /etc/netplan/00-installer-config.yaml
network:
  version: 2
  ethernets:
    enp4s0:
      dhcp4: no
      addresses: [192.168.1.50/24]
      routes:
        - to: default
          via: 192.168.1.1
      nameservers:
        addresses: [1.1.1.1, 9.9.9.9]

# Apply:
# sudo netplan apply
Step 5: Drivers, CUDA, and Ollama
Now follow our Ubuntu install tutorial inline, install the NVIDIA driver, install Ollama, expose it on 0.0.0.0:11434 so the rest of the LAN can reach it. The only change from a desktop install is OLLAMA_HOST=0.0.0.0:11434 which lets the daemon listen on all interfaces.
sudo ubuntu-drivers autoinstall
sudo reboot
# After reboot:
nvidia-smi  # confirm GPU is detected

curl -fsSL https://ollama.com/install.sh | sh

sudo systemctl edit ollama.service
# Add:
# [Service]
# Environment="OLLAMA_HOST=0.0.0.0:11434"
# Environment="OLLAMA_ORIGINS=*"
# Environment="OLLAMA_KEEP_ALIVE=24h"

sudo systemctl daemon-reload
sudo systemctl restart ollama
Step 6: Stand up Open WebUI
You now have an Ollama API on http://192.168.1.50:11434. Slap Open WebUI in front of it using Docker. Open WebUI gives you a polished ChatGPT-style frontend, multi-user accounts, conversation history, and RAG with file uploads. It runs perfectly in a single container.
# Install Docker
curl -fsSL https://get.docker.com | sh
sudo usermod -aG docker $USER
newgrp docker

# Run Open WebUI pointing at local Ollama
docker run -d \
  -p 3000:8080 \
  -v open-webui:/app/backend/data \
  --add-host=host.docker.internal:host-gateway \
  -e OLLAMA_BASE_URL=http://host.docker.internal:11434 \
  --name open-webui --restart always \
  ghcr.io/open-webui/open-webui:main

# Now visit http://192.168.1.50:3000 from any device on your LAN.
Step 7: Health checks and monitoring
A 24/7 server needs eyes on it. Install nvtop (live GPU monitor like htop), set up a small systemd timer that emails you on disk-full, and consider Netdata for a dashboard. Total install: 5 minutes, peace of mind: enormous. None of this is required for the box to work, but you will thank yourself when a runaway model leak fills 4 TB at 3 a.m.
sudo apt install -y nvtop btop

# Netdata one-liner, gives you a dashboard at http://server-ip:19999
bash <(curl -SsL https://my-netdata.io/kickstart.sh)

# Quick test: kick off a heavy prompt and watch:
nvtop  # in one tmux pane
btop # in anotherWhat you have now
A purpose-built AI server on your LAN, accessible from any device, running 24/7, with Open WebUI for chat and the raw Ollama API for everything else. From here you can layer in RAG, agents, code copilots, and home-automation hooks. The hard part, buying parts, screwing them together, getting drivers right, is done. The fun part is just beginning.
Tags
Stuck? Share your build?
Hundreds of homelabbers are working through these same tutorials in our community. Drop your config, ask the hard question, or show off what you built.
Join the discussion